Showing posts with label furniture makeover. Show all posts

Tuesday, 12 December 2017

It’s not fancy, but it’s been home

When we moved to Nova Scotia, we thought we’d be living in our rental house for a year. Then that year became two years. And then two and a half years. And now we’re finally moving out – and moving into another rental house. UGH! I’m telling you, building a house yourself takes a loooonnnnggggg time!

When we first moved into our rental house, it was kinda… well, old and tired. Nothing really wrong with it, but not much had changed since it was built in the ‘70s. Luckily our landlord has been super-cool and bought new light fixtures and appliances and faucets and even let us make over the kitchen.

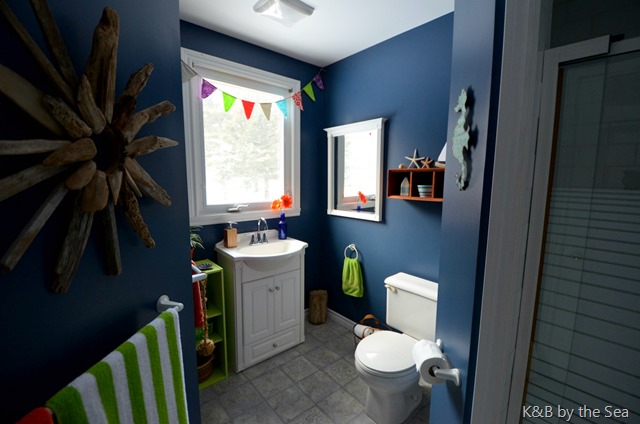
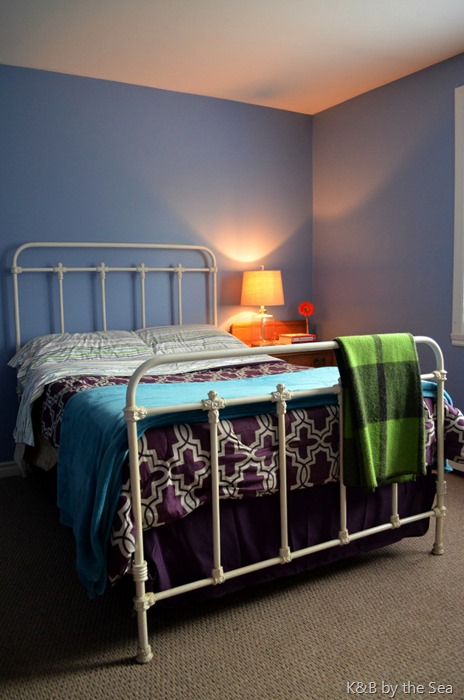
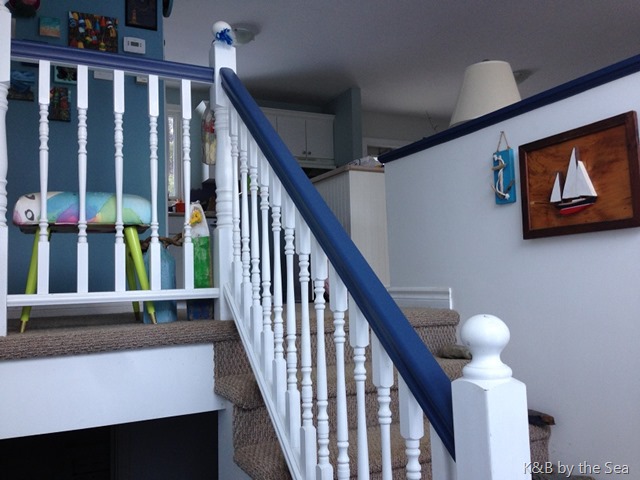
I don’t have many before pictures, but here are a few afters…


exterior front


from bedroom


bed and table


corner 3 rs


KB by the Sea - bedroom 4


orange oar


blue railing


kitchen 2

And I also did some furniture makeover projects along the way…


after 3


turquoise after


DSC_0428


whole table


pink dresser


And some little decor projects…


gallery wall 2


cushion 1a front


shelf


So sitting here on our last night in this house,  I’ve got mixed emotions. I really wish we were actually moving into our house, so the fact that we aren’t kinda sucks. Our next rental house is quite nice and has great views and is closer to the beaches. And as much as I sometimes complain about this house being small and not having anywhere to go to escape from Brian, I’m actually going to miss it. It’s suited our needs perfectly, and it feels a lot more like a home now than just a rental house. I hope the people who are moving in next week enjoy living here as much as we have.

Onward and… well more like sideways than upwards, but we’re getting there!


KB sig

Sunday, 8 May 2016

From brown & old to bright & bold

dresser makeover


A couple of weeks ago, I met up with my friend Victoria who was in Lunenburg visiting Wendy from Front Porch Mercantile. Victoria and her brother own The FAT Paint Company and Wendy sells FAT Paint in her shop and is also the FAT Paint distributor for the Maritimes. So after spending time with these two paint ladies, I felt a need to do some FAT painting :-)

I picked up this dresser at a garage sale last summer with the plan to paint it. Which I kept putting off doing. Until a couple of days ago when I finally goy my butt in gear and got ‘er done.

dresser before


If you know me, you know that my favourite colours are purple, turquoise, and green. I was going to paint the dresser turquoise, but then I decided I needed to move out of my comfort zone. And boy, did I ever! I picked up a few cans of paint from the new Amanda Forrest collection…


FAT paint


And then cracked open a can…. Orangeapalooza anyone? :-D


orange

I gotta be honest, there were some moments when I wondered what I was thinking – this is no shrinking violet colour! I broke up the orange a bit by painting the drawer fronts Blushing Bombshell.

I gotta be honest again –  I was too lazy to fill the holes in the drawer fronts and I couldn’t find any pulls I liked that fit the 3” spacing. So I picked up a can of Krylon spray paint and just painted the existing pulls and knobs gold.


knobs     pull


A coat of wax and some buffing, and voila, my new Orangepalooza & Blushing Bombshell dresser…


front view


side view


top drawer


And there you go – from brown & old to bright & bold!


kb logo 1a


Linking to…

Between Naps on the Porch Metamorphosis Monday

Wednesday, 7 October 2015

Coffee table makeover, Part 2 – The save!

So this is where we left off yesterday – with a pretty crappy looking coffee table after multiple fails at painting it with milk paint. All sanded down and ready for yet another attempt at giving it a new paint job…

sanded down


All primed and ready to go…


primed


And  all painted it with my new favourite furniture paint, INSL-X Cabinet Coat. And FINALLY, the paint didn’t peel or crack or chip, YAY!


green table


No more chipped feet! YAY!

foot


The colour is nice, but it could use a little something more. The uneven top of the table doesn’t make for a very good spot to put down your laptop or dinner plate. So to make the whole top one level surface, I used two pieces of MDF cut to size. And to make things a bit more interesting, Brian and I decoupaged a map of nova Scotia onto the pieces of MDF.


mdf pieces


And that took two attempts. My first attempt was a total fail – I trimmed the overlapping edges of the map while the paper was still wet and it tore and left a raggedy edge. Then when I went to the tourist center to get another map, they didn’t have any left and weren’t expecting to get any more. What the what?! Luckily another tourist center had the maps in stock, and I picked up two just to be safe. And then I handed the job of sticking the maps onto the pieces of MDF to Brian, because I knew he wouldn’t screw it up :-D

The pieces of MDF fit into the spaces perfectly :-)

edge


inserts


My favourite part of Nova Scotia :-)


south shore


I painted on five coats of Mod Podge and sprayed on an entire can of Krylon sealer. Unfortunately, the finish isn’t as resilient as I’d hoped. Hot thing stick to it, but oh well, at least the table is DONE!


from top


whole table


And that, my friends, is the end of the coffee table from hell project!

Have you ever started a project that turned out to be a disaster? And were you able to save it?

kb logo 1a

Linking up to…

Inspire-Me-Monday-Link-Party    MM

Tuesday, 6 October 2015

Coffee table makeover, Part I – The epic fail

*DISCLAIMER* I know that milk paint is super-popular. Everybody loves it. It’s so easy to use. There are hundreds, thousands, maybe even millions of pictures of furniture painted with milk paint on Pinterest  So I’m not saying that milk paint sucks. I’m saying that milk paint sucks for me.


It started out as an easy enough project – give this pale yellow coffee table a paint makeover.

before


I’d never used milk paint, so decided that I would give it a try on this table. I even went to an info session on how to use milk paint and bought all the supplies I’d need to create a lovely two-tone blue effect.

I was excited to get started. I cleaned the table to remove any dirt or residue. I gave the table a light sanding. I mixed the milk paint with the bonding agent to be sure that the paint would adhere. Three steps to ensure the perfect finish.

The first coat went on great.

navy


And then it was all downhill from there. I can’t even begin to tell you how much this sucked. But I’ll try anyway, because I don’t have pictures to tell the story. Because I was so annoyed and fed up and disappointed in how the table looked, I couldn’t even be bothered to take pictures of it. It was truly ugly.

After the first dark blue coat, I painted a lighter blue coat. With some sanding and wax application, this was going to give me a beautiful two-toned blue finish. Instead, what it gave me was chipping and peeling and cracking paint. This wasn’t supposed to happen! I decided to try hemp oil instead of wax, thinking that maybe that would somehow make the paint stick. It didn’t. There’s literally not a single picture of this part of the process. That’s how bad the table looked.

At this point, I decided to move on to plan B. I used a hand sander to sand the entire table. Then I cleaned the whole table again and mixed up a batch of my own custom light blue milk paint and added the bonding agent and painted two coats onto the table. There were a few spots that needed touching up after the two coats. I had to add a bit of water to the paint to thin it down, which changed the colour of the paint. ARGH! So instead of doing touch ups, I had to paint a third coat. Then I waxed the whole table. And… the damn paint chipped and peeled and cracked again! I mean really, how crappy does this look?


chipped foot

chipped edges


I lived with it like this for a few weeks because quite frankly, I was tired of painting. Then one evening while I was watching TV, I started to pick at some of the peeling paint. It flaked right off. I got out a screwdriver, and paint chips literally flew everywhere as I ran the screwdriver along the peeling paint. Then I sanded the whole table with a hand sander AGAIN.

sanded down


DSC_0381


At this point, I was really wishing I’d never painted this stupid table in the first place! But, I’m stubborn. And the table isn’t actually mine (it came with the rental house), so I couldn’t leave it looking like this. What was supposed to be a quick & simple paint job was now a total of two cleanings, one quick sanding, two in-depth hand sander sandings, one coat of hemp oil, one coat of wax, and five coats of paint. And I was back to square one. Actually, I had passed right by square one and was in the negative square zone. Because at this point, the table looked even worse than it did when I’d started.

And that’s why milk paint sucks for me.

Does milk paint suck for anyone else? Or has everyone who’s used it had better luck than me?

Luckily, I was able to save this table from being a complete disaster. Tune in tomorrow to see the final result – which still isn’t perfect, but it’s a lot better!

kb logo 1a

Linking up to…

Inspire-Me-Monday-Link-Party   MM

Wednesday, 16 September 2015

Have spray paint, will travel

Here’s a quick and cheap little furniture makeover using spray paint. I started with two little corner tables – which have drawers, but I apparently took the drawer out of this one before I snapped the picture and then didn’t realize till after the painting was done that I didn’t have a before picture with the drawer.

before


Here’s the drawer…


 drawer before


I gave the two tables a quick cleaning with TSP Eco, and then sprayed on a couple of coats of Krylon spray paint – Navy on one and Blue Ocean Breeze on the other.


krylon


I picked up a couple of new drawer pulls, and for about $10.00 each, voila, two brand new tables.


after 1


drawer 2


after 2


turquoise after


drawer turquoise


Spray paint isn’t for every project, but it sure worked well on these two tables!


kb logo 1a